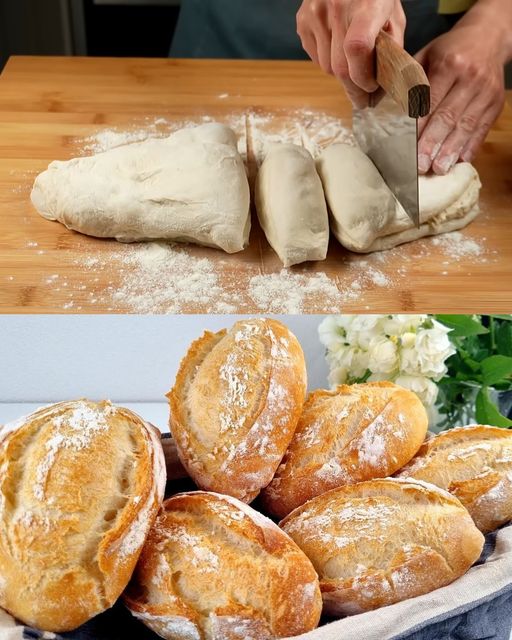
Instructions:
Activate the Yeast:
In a small bowl, dissolve the sugar and yeast in the lukewarm water. Make sure the water is not too hot, as it can kill the yeast. Let this mixture sit for about 5-10 minutes until it becomes foamy, indicating that the yeast is activated.
Prepare the Dough:
In a large mixing bowl, combine the bread flour and salt. Create a well in the center of the flour and pour in the yeast mixture.
Gradually mix the flour with the water, using a spatula or your hands, until a soft dough forms. The dough should be slightly sticky but manageable.
Knead the Dough:
Transfer the dough onto a lightly floured surface and knead it for about 8-10 minutes. The goal is to develop the gluten, which will give the bread its structure and elasticity.
The dough should become smooth and elastic by the end of kneading.
First Rise:
Shape the dough into a ball and place it in a lightly oiled bowl. Cover it with a damp cloth or plastic wrap, and let it rise in a warm place for about 1-1.5 hours, or until it has doubled in size.
Shape the Dough:
After the dough has risen, punch it down gently to release the air. Turn it out onto a floured surface and shape it into a loaf.
You can shape it into a round loaf, a baguette-style loaf, or even place it into a bread tin for a more uniform shape.
Second Rise:
Place the shaped dough onto a parchment-lined baking sheet or into a greased loaf tin. Cover it again with a damp cloth and let it rise for an additional 30-40 minutes, or until it has puffed up.
Preheat the Oven:
While the dough is doing its second rise, preheat your oven to 220°C (425°F). If you want a crispy crust, place a shallow pan of water on the bottom of the oven to create steam while the bread bakes.
Bake the Bread:
Once the dough has risen, make a few shallow slashes on the surface with a sharp knife or bread lame. This helps the bread expand while baking.
Bake the bread in the preheated oven for 20-25 minutes, or until the crust is golden brown and the bread sounds hollow when tapped on the bottom.
If using a bread tin, the baking time may extend slightly to ensure the bread is fully cooked through.
Cool the Bread:
Once baked, remove the bread from the oven and allow it to cool on a wire rack. It’s important to let the bread cool before slicing, as this allows the interior to set properly.
Nutritional Facts (per slice, approximately 1/12th of the loaf):
Calories: 80 kcal
Carbohydrates: 16g
Protein: 3g
Fat: 0.5g
Fiber: 1g
Sugar: 1g
Sodium: 150mg
Storage Tips:
Room Temperature: Store the bread in an airtight container or a bread bag at room temperature for up to 3-4 days. Avoid storing bread in the fridge, as it can dry out faster.
Freezing: If you want to store the bread for longer, you can freeze it. Once cooled, slice the loaf and place the slices in a freezer-safe bag. Bread can be stored in the freezer for up to 3 months. To reheat, simply toast the slices or warm them in the oven.
Cooking Tips:
Use Lukewarm Water: The water should be warm to the touch but not hot, around 38°C (100°F), to help the yeast activate.
Measure Ingredients Accurately: Use a kitchen scale to measure the flour for the best results, as too much flour can make the bread dense.
Kneading the Dough: If the dough feels too sticky, add a bit more flour, but avoid adding too much as it can make the bread heavy.
Crust Variations: For a softer crust, you can brush the bread with melted butter as soon as it comes out of the oven. For a crunchier crust, add the pan of water to the oven as mentioned earlier.
Flavor Additions: This basic bread recipe can be easily customized. You can add herbs like rosemary, thyme, or garlic powder for extra flavor. Seeds like sesame, flax, or sunflower can also be sprinkled on top for added texture.


